Blog
21 April, 2024
June 19, 2022
Over the last year, Aviv Shaar has achieved two new NSX-T badges: VCP-NV 2022, and VCAP-NV (Design) 2022, and he is now well on the way to achieving the VCAP-NV (Deploy).
As part of the certification process for his last project with NSX-T based on LDAP, Aviv was required to do a distributed firewall (DFW) based on an identity firewall project. “I was surprised at how long it took me to find all the pieces necessary to implement the solution!” Aviv noted. “So, I collected all the information, step by step, in one place.” Here, Aviv shares everything you need to know to execute this DFW:
LAB Environment:
1. vCenter 7.0.3
2. ESXI 7.0.2
3. NSX-T 3.1.2
4. Windows Server 2019
I will focus on deploying and configuring NSX-T:
1. Configure LDAP with NSX-T.
2. Configure Identity Firewall AD.
3. Enable LDAP with NSX-T.
4. Configure one rule base LDAP.
First, open NSX-T UI and press on System > User and Roles > ADD IDENTITY SOURCE:
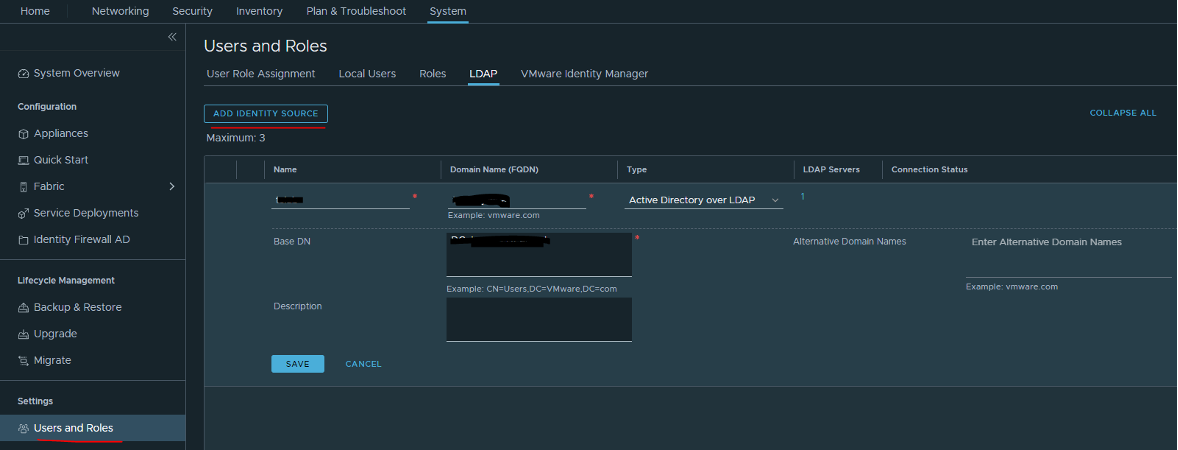
Note: When integrating with Active Directory, NSX Manager allows users to log in using their samAccountName, or userPrincipalName. If the @domain portion of the userPrincipalName does not match the domain of the Active Directory instance, you should also configure an alternative domain in the LDAP configuration for NSX-T.
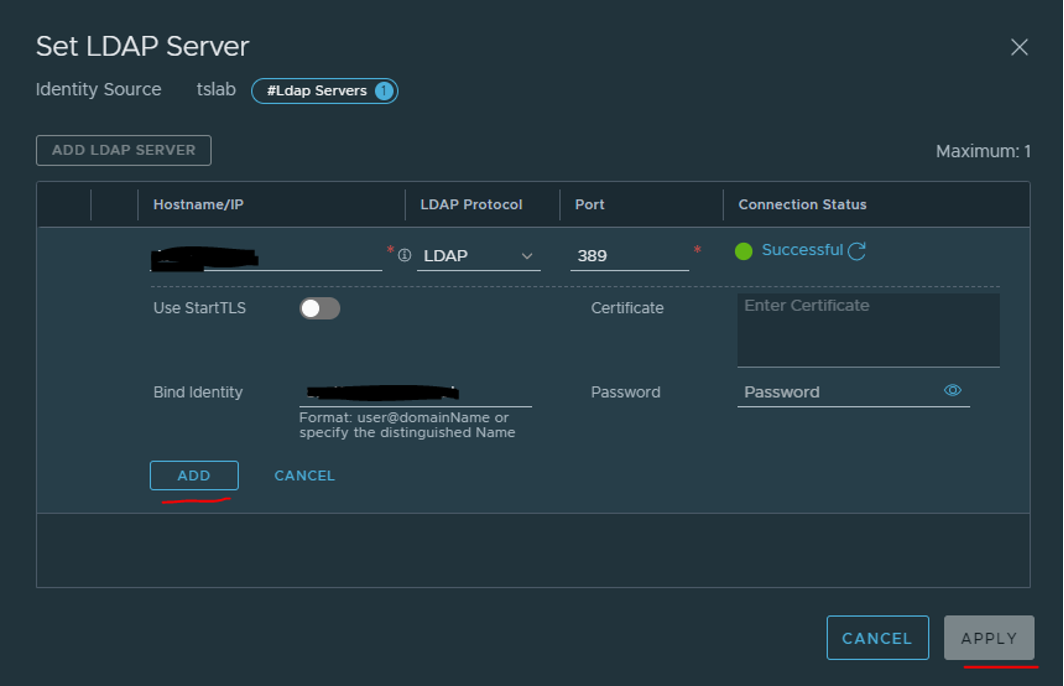
Then, go to ADD LDAP server, press Check status, and press ADD
Now you will need to configure Identity Firewall AD. Press on System > Identity Firewall AD > Active Directory and add a new AD server.
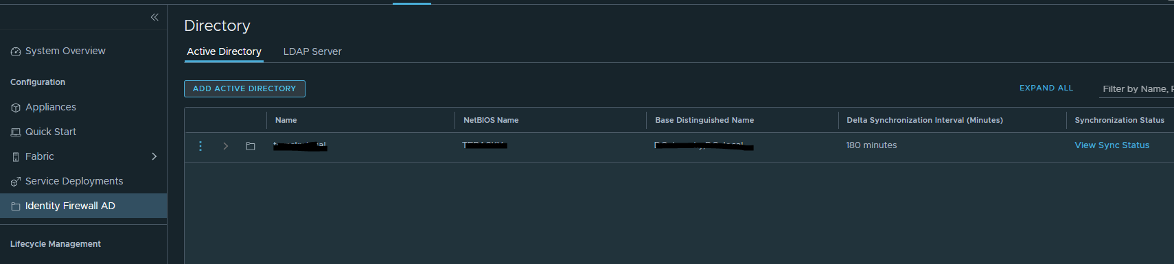
Fill in the fields:
1. Name
2. NetBIOS Name
3. Base Distinguished Name
4. Add LDAP Server
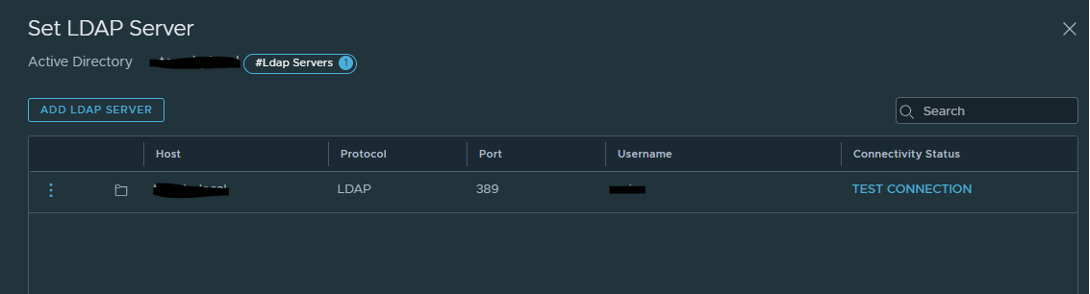
And test the connection!
Once it is configured, press System > User Role Assignment > ADD > Role Assignment for LDAP:
1. Choose the identity source that you configured.
2. Search your user or group.
3. Choose the group role.

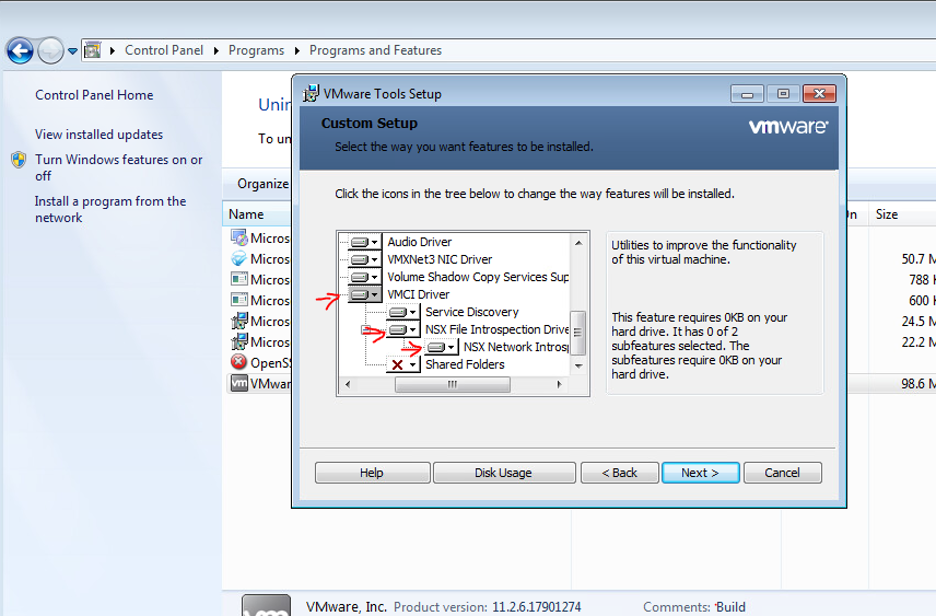
When the group\user is configured, you will need to connect to the Windows VM and enable three drivers from the VMware tools:
• VMCI Driver
• NSX File Introspection Driver
• NSX Network Introspection Driver
In this link you will find all the identity firewall support configurations.
Next, we will create an NSX-T group that includes the AD group that I created (Aviv-TEST)
Click on Inventory > Group > Add Group > AD Group and search your AD group.
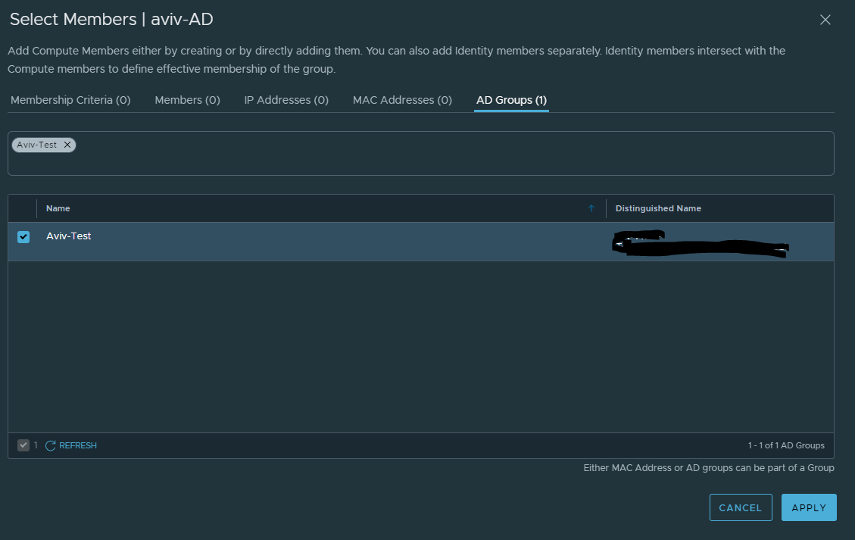
Select the group and click APPLY.
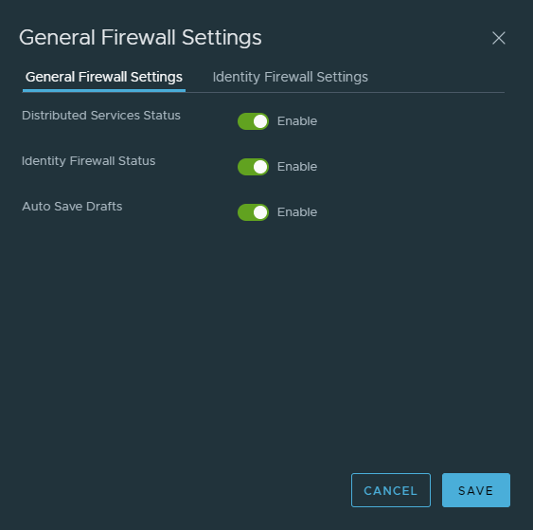
Now we need to define one more thing and then we can configure DFW based on the identity firewall.
Click Security > Actions > General settings and enable Identity Firewall Status:
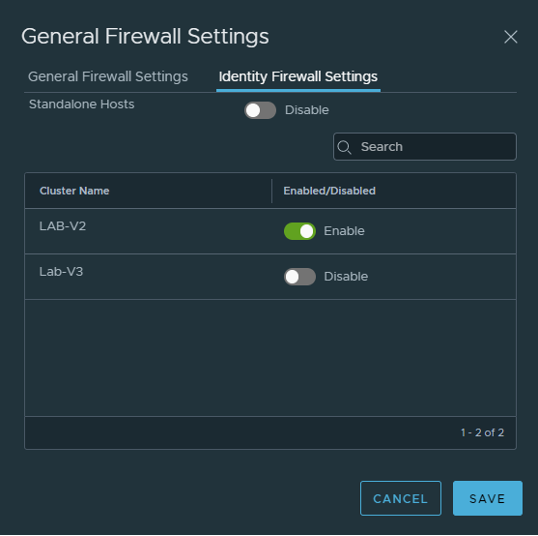
Select the cluster you want to enable that feature:
Now you can create a DFW rule that includes the aviv-AD group (that includes the Aviv-TEST that I created in the AD), and you can configure any rules.

I hope you found this guide useful and that it saves you time and headaches!
This blog was contributed by:
Aviv Shaar, (Cloud Network Consultant), Nimrod Shoshani, (Infrastructure Team Leader), and Naor Aviv, (Cloud Network Consultant):