Blog
27 March, 2024
June 19, 2022
Hello to all my fellow VMware NSX enthusiasts!
In the last year, I was proud to achieve two new NSX-T badges: VCP-NV 2022 and VCAP-NV (Design) 2022. I am also well on the way to achieving the VCAP-NV (Deploy)! Part of the process of earning these badges involves writing extensive automation – I learned a great deal from the exercises, and it occurred to me that the automation I wrote could serve the community and help others deploy and configure NSX-T more easily.
The automation I wrote as part of the badge requirements was done in PowerShell, Python, and Ansible.
In this blog, I will focus on a few aspects of micro-segmentation:
1. Deploying NSX-T with Ansible.
2. Creating an NSX-T segment.
3. Migrating VMs to a new segment.
4. Tagging all VMs and creating security groups.
5. Exporting vRNI recommendation firewall rules.
6. Filtering irrelevant rules.
7. Creating new services in NSX-T.
8. Creating the relevant rules with Python.
9. EnforcIng DFW policy.
Starting with NSX-T deployment, this Ansible code will create the following steps:
a. Deploy NSX-T from OVA.
b. Check manager status.
c. Add license.
d. Register NSX-T with vCenter.
e. Create Transport Zone for VLAN.
f. Create uplinks profile.
g. Create Transport Node profile.
h. Configure NSX-T on the cluster with the TN profile.
As a first step, I created a “vars.yml” file that includes all environment variables and then ran the script (which creates all the infrastructure):
“Ansible-playbook deploy_nsxt.yml -v”
Note: Before running the script, upload the NSX-T version to the nsx-t_ova folder.
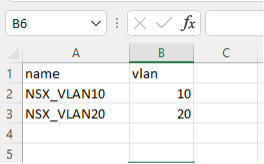
When the NSX-T was up and running, and the ESXi configured, I started to create all the new segments and migrate the VMs NICs to them. For that, I wrote a PowerShell script, which created all the segments based on a CSV file that contained the VLAN list and the numbers.
I ran the PowerShell script “Add_segments,” and the CSV file looked like this:
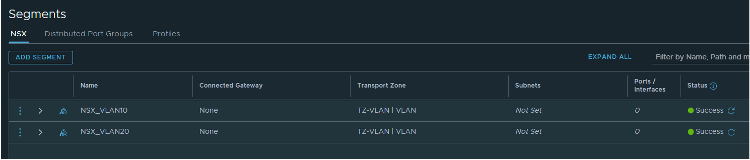
Once it is finished, you can see your segments in the NSX-T UI:
All of my VMs are connected to VLAN10 and VLAN 20, enabling the migration of one VM to test the new segment; after that, all the VMs can be migrated from the vCenter UI:
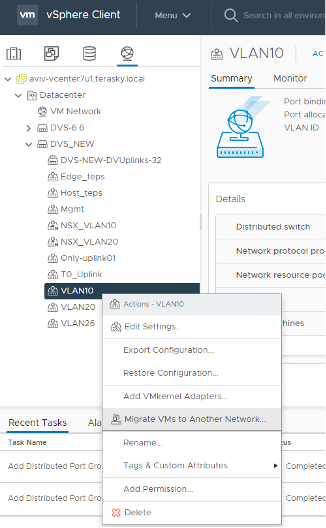
Navigate to “Migrate VMs to Another Network” >> select the new segment “NSX_VLAN10” >> select all the VMs finish.
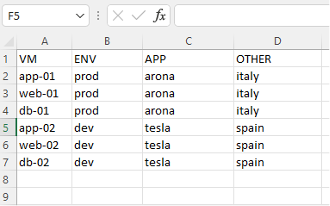
After all, the VMs have been migrated, and everything works properly, you can begin to tag any VMs that take part in the DFW policy (I created the DFW rules base on security groups). While all VMs will include several tags, it is very important to find the balance – too many or too few tags per VM will make it difficult to aggregate any VMs that share the same common denominator to the same security group. To achieve that, I exported all the VMs with RVTools, and then copied all the VM names to the CSV file (column for VM name and each column for tag). For example:
I installed vRNI and connected them to the NSX-T VIP IP, following which I will need to wait for one month, then export all the recommendation firewall rules to a CSV file.
In the meantime, I moved to vRNI and exported all the recommendation firewall rules:
1. Connect to vRNI.
2. Click Plan and Assess > Security Planning
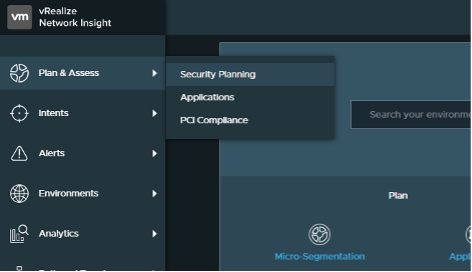
3. Click More
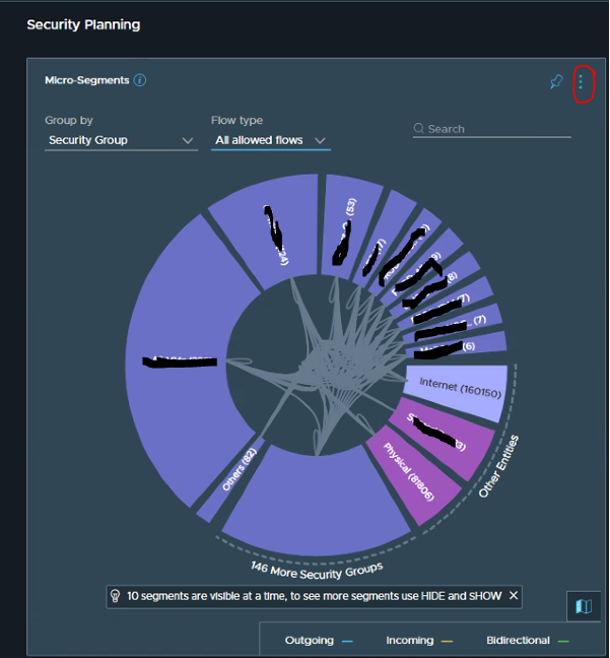
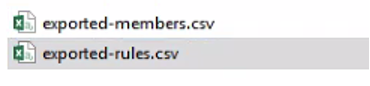
4. Export Rules as CSV
![]()
5. Open the file “exported-rules.csv”
At this point, the customer IT team needs to delete all the irrelevant flows in the excel file to enable the relevant rules to configure in the DFW policy with Python script.
This is the result of the exported-rules file (in base source and destination port groups):

The Python script first creates all the ports in the column port (based on protocol if it’s TCP & UDP), then creates sections and rules based on the source groups (meaning we will have a section for each security group), and continues to build it following that logic:
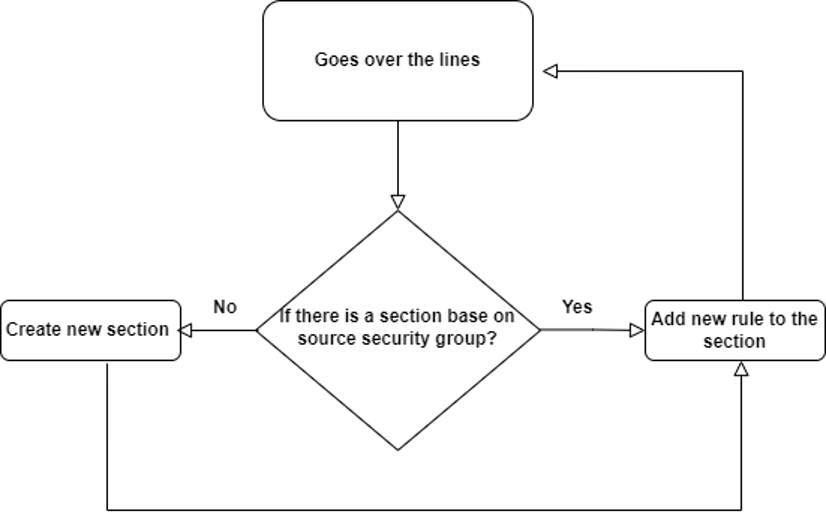
Now there is one section for each security group that includes the relevant flow of the company.
Note: it`s important to ensure that logging is enabled on all the rules.
After waiting a couple of weeks, we checked the any-any rule id (DFW rule id 2), as well as whether we missed any flows. If flows have been missed, they need to be added to the DFW. I completed this process roughly once a week or once every two weeks. Sometimes there are organizational processes that run once a month or even more frequently, so I need to confirm the lifecycle of the customer’s business in order to cover as many rules as possible. Once the customer feels comfortable with the DFW, it is possible to change the last rule of policy (rule id 2) to drop, ending the project.
This blog was contributed by:
Aviv Shaar, (Cloud Network Consultant) , Nimrod Shoshani, (Infrastructure Team Leader) and Naor Aviv, (Cloud Network Consultant)