Blog
21 April, 2024
December 15, 2023
Until recently, delivering applications to users frequently required creating a large number of Master Images for a variety of relevant software setups. The problem was that the Master Images were required regardless of how many – or how few – users needed any given software, and the process of publishing new snapshots was disruptive to working users.
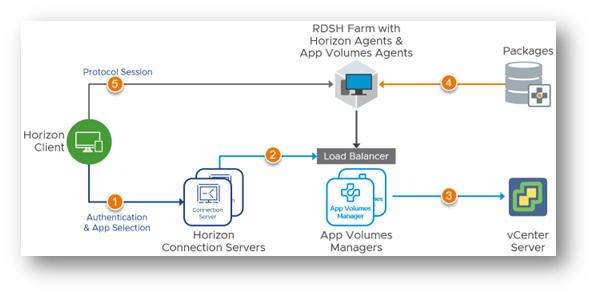
Horizon 8 version 2212, in conjunction with App Volumes 4 version 2212, introduces Horizon Published Apps on Demand. This combines the power of VMware App Volumes with Horizon Remote Desktop Services Host (RDSH) Farms to simplify the delivery of published applications.
When a user requests an application delivered by Horizon Apps on Demand, Horizon and App Volumes work together to attach the application package to an RDSH server in real-time.
The operating system image used in the RDSH Farm can be kept generic as applications do not need to be installed into the golden image but instead are attached only when needed.
In short, this update makes it easier and more efficient to deliver applications to users in a virtual desktop environment without having to create multiple versions of the base system for different software needs. Applications are only added when requested, which reduces the complexity and potential disruption to users.
Sound good? Here’s everything you need to know – step-by-step — to get started:
Prerequisites:
Criteria for using on-demand applications:
If we check the version of the package agent, we notice that it is prior to 2111
![]()
• The application programs installed during the packaging process must have shortcuts.
Characteristics of an Application Package delivered as On-demand:
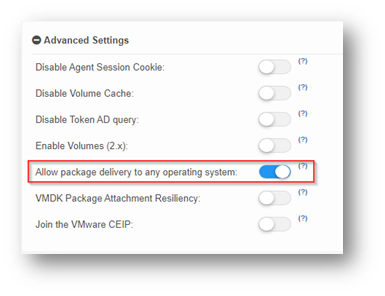
Step #1: Activate the feature.
Head over to the “Configuration” tab. On the Settings sub-tab, scroll down to the bottom of the page and open the “Advanced Settings” menu and enable “Allow package delivery to any operating system”
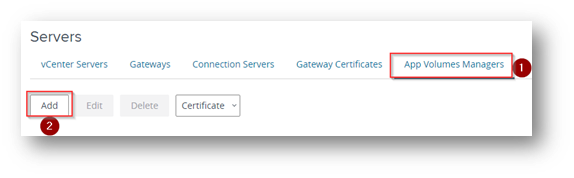
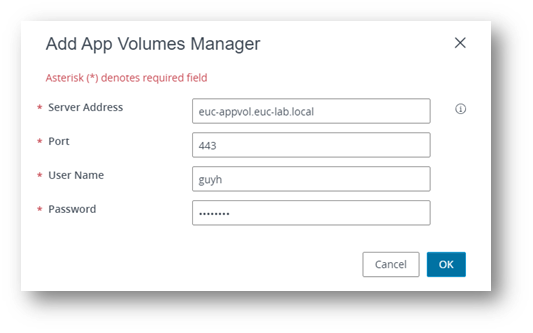
Step #2: Add App Volumes Manager to Horizon
Log in to Horizon Admin panel and navigate on the left side of the menu to “Servers”.
Select “App Volumes Manager” and click “Add”.
Enter your App Volumes Manager FQDN or IP ADDRESS and the desired credentials.
You can specify a load balancer FQDN or IP ADDRESS.
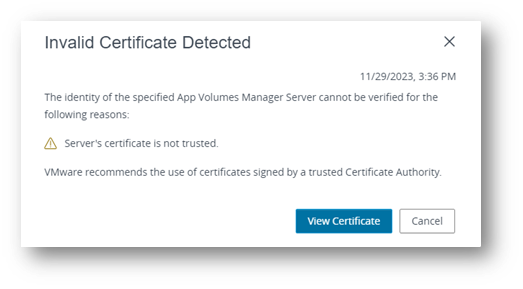
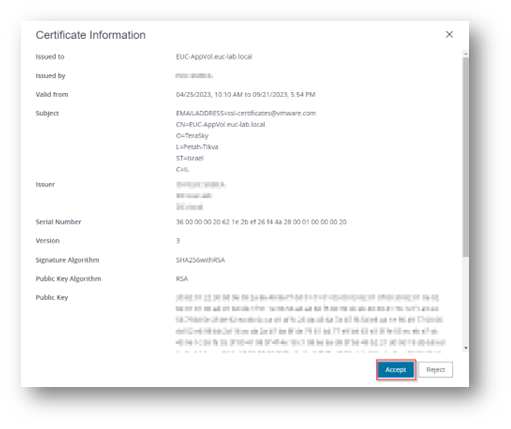
Usually, a self-sign certificate is used when installing App Volumes Manager.
If you see a message indicating an invalid certificate, click “View Certificate” and click “Accept” to trust the SSL certificate.
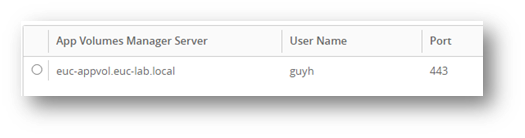
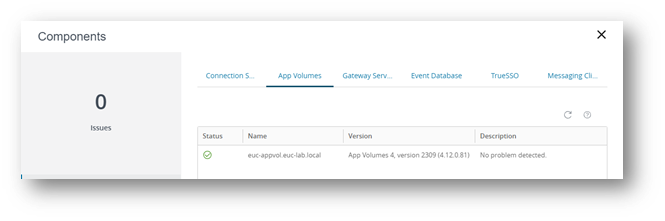
App Volumes Manager Server added successfully.
Now, you can also monitor the server from the Horizon dashboard and detect if the server is up and running or if it has issues.
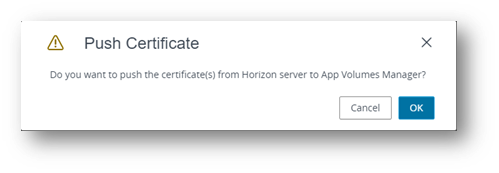
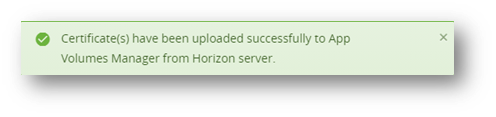
Horizon console pushes the SSL certificate, which is used to verify application entitlement in App Volumes Manager.
In case of an error during launch due to entitlement, you can push the certificate manually.
To do so, highlight the desired App Volumes server and select “Certificate” and “Push Certificate.”

If you change the certificate of the App Volumes manager that you already added, you can re-validate the certificate by selecting “Re-validate certificate” and accepting the new certificate.
Step #3: Associate the App Volume Manager to the RDSH Farm
For published application on-demand you must associate an App Volume Manager with an Instant-clone farm.
On the “Farms” page, check the desired RDSH farm, under “More Commands” click “Associate App Volumes Manager”.
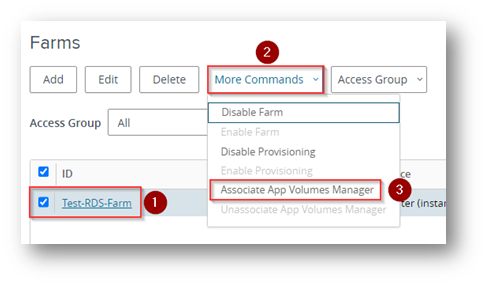
Select your App Volumes Server from the drop down menu.
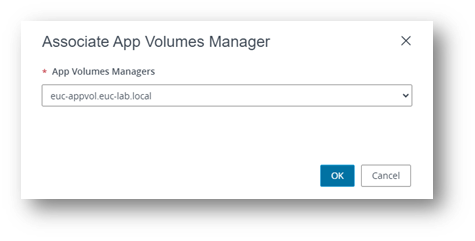
Now the App Volumes Manager server is associated with the Farm.

Step #4: Add Applications
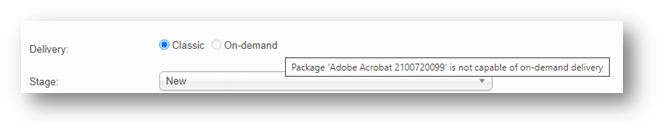
To add applications to Horizon, the application on the App Volumes must be set as “On-demand” delivery state and must meet the following criteria:
Log in to the App Volumes Manager, edit or provision a package, and set it to “On-demand” Delivery.

Ensure that the package is set to “CURRENT.” If not, click “Set CURRENT” on the package page.

Click “Set CURRENT.”
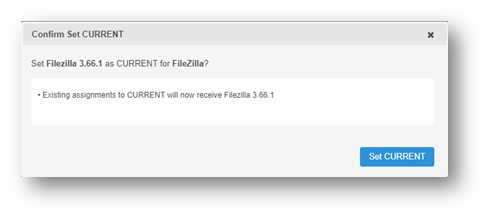
The package is now set to “CURRENT” and “On-Demand” state.

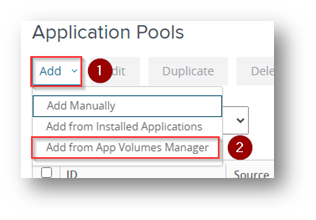
Log in to the Horizon admin panel and navigate to the “Application Pools” page.
Click on “Add” and select “Add from App Volumes Manager.”
Check the application you want to publish and click on “Next.”

Edit the application display name if needed.

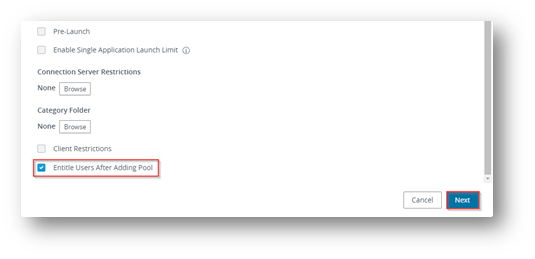
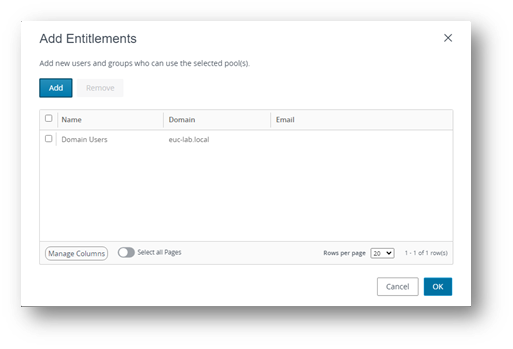
You can scroll down and choose “Entitle users after adding pool” and enter a user or group you want to assign the application to.
Click next and add users or groups.
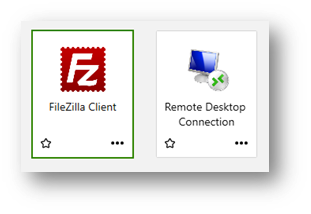
Now you can see we have a native application that we added the traditional way to Horizon and a new application that is marked as “App Volumes” source.

Connect to Horizon client and test the new application added.
The application opens on the client’s side.
Switch over to App Volumes Manager and select the “Attachments” tab. You can see 2 types of Assignments:
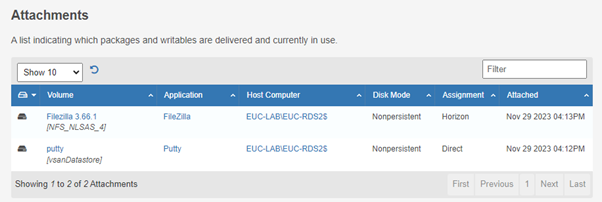
The Application was successfully delivered to the user!
Written by: Guy Hemed, End User Computing Specialist
Implementing Horizon Published Apps on Demand, as outlined in this guide, offers a streamlined approach to application delivery in virtual desktop environments. By combining the strengths of Horizon 8 version 2212 and App Volumes 4 version 2212, users can now access needed applications seamlessly without the hassle of managing numerous master images. If you have any questions or need further assistance in optimizing your virtual desktop setup, feel free to reach out to TeraSky – we’re here to help you make the most of these powerful features.