Blog
8 May, 2024
May 15, 2023
Provisioning a Tanzu Kubernetes Grid Service (TKGS) cluster from vRealize Automation 8 (vRA8) with Ansible Post provisioning automation to install Prometheus and Grafana
Provisioning a Tanzu Kubernetes Grid Service (TKGS) cluster on vRealize Automation 8 (vRA8) with Post provisioning automation to install Prometheus and Grafana can be a daunting task, especially if you have never done it before. However, with the right steps and tools, the process can be much smoother and easier. In this blog post, we will explore how to provision a TKGS cluster on vRA8 and configure Prometheus, Grafana, and other prerequisites using an Ansible playbook.
Prerequisites
Before we dive into the steps for provisioning a TKGS cluster on vRA8, there are a few prerequisites that you need to have in place.
First, you should have vRA8 installed and configured, with vRO connection to your AD server.
Second, you should have vSphere with Tanzu supervisor cluster configured.
For lab purposes, we uses William Lam’s automated deployment, which you can find on GitHub: https://github.com/lamw/vsphere-with-tanzu-nsx-advanced-lb-automated-lab-deployment.
The Third and last requirement is having SSH host configured and available from vRO.
The SSH host requirements are:
– Kubectl
– Python with Kubernetes module
– Ansible
– Network access to TKGs supervisor and workload clusters
Steps for Provisioning a TKGS Cluster on vRA8
Step 1: Connect vCenter Endpoint
The first step in provisioning a TKGS cluster on vRA8 is to connect the vCenter endpoint. This is necessary to enable vRA8 to discover the resources that are available for provisioning. You can connect the vCenter endpoint by navigating to Infrastructure -> Connections -> Compute and selecting “Add Endpoint” -> “vSphere” and filling in the required information. Make sure the Username provided has sufficient credentials to Workload management. On our case we granted a vSphere administrator permissions, if you would like to limit the access to your vSphere and include only permissions for that purpose please refer to VMware KB 79984 “The Required Permissions for a Tanzu Kubernetes Grid (TKG) vSphere Role”:
https://kb.vmware.com/s/article/79984
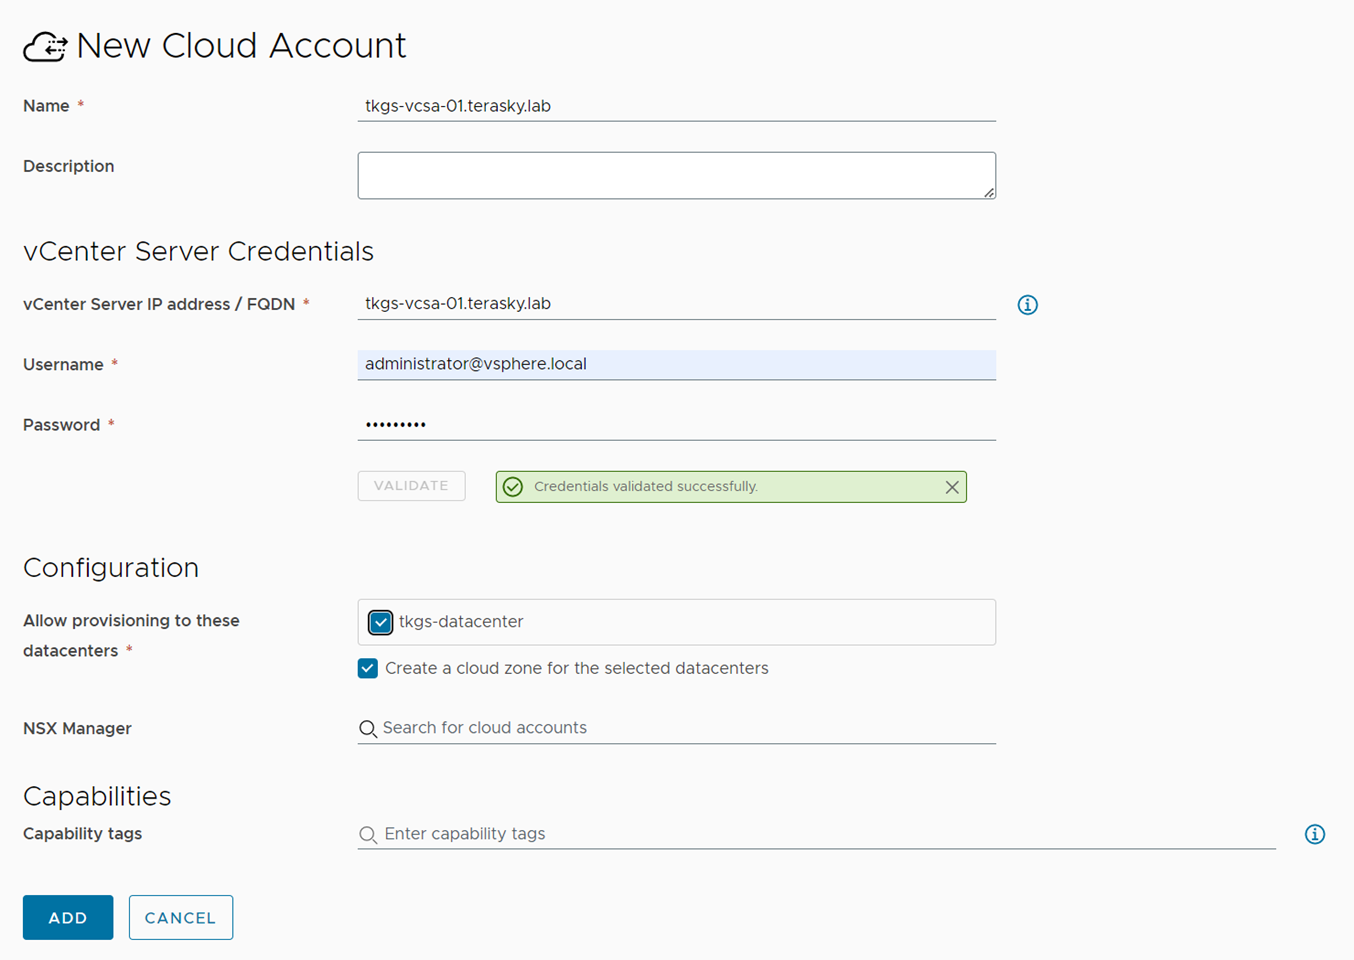
Figure 1 New Cloud Account
Step 2: Connect Supervisor Cluster and Namespace to vRA8
The next step is to connect the Supervisor cluster and namespace to vRA8. This will allow vRA8 to provision and manage the TKGS cluster on the Supervisor cluster. You can connect the Supervisor cluster and namespace by navigating to Infrastructure -> Resources -> Kubernetes, and under the “Supervisor Clusters” tab, click on the “Add supervisor cluster” button.
Select the vSphere account, Select Supervisor Cluster, and click Add.
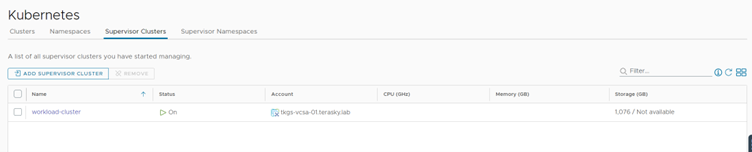
Figure 2 Add Supervisor Cluster
If you previously configured Supervisor Namespace directly from vSphere, we can add it now. Else, we can create a new Supervisor namespace directly from vRA.
In our case, we have prepared the supervisor cluster in advance. We will import our TKGS supervisor namespace to the vRA8 environment:

Figure 3 Add Supervisor Namespace

Figure 4 Supervisor Namespace
Step 3: Create a New Kubernetes Zone on vRA8
Now that the Supervisor cluster and namespace are connected to vRA8, you need to create a new Kubernetes zone. This is necessary to define the scope of the Kubernetes resources that vRA8 can manage. You can create a new Kubernetes zone by navigating to Infrastructure -> Zones -> Kubernetes and selecting “Add Zone.” Select vSphere Account, Give the zone a name, assign a capability tag, and under the provisioning Tab, select the previously added Supervisor namespace.
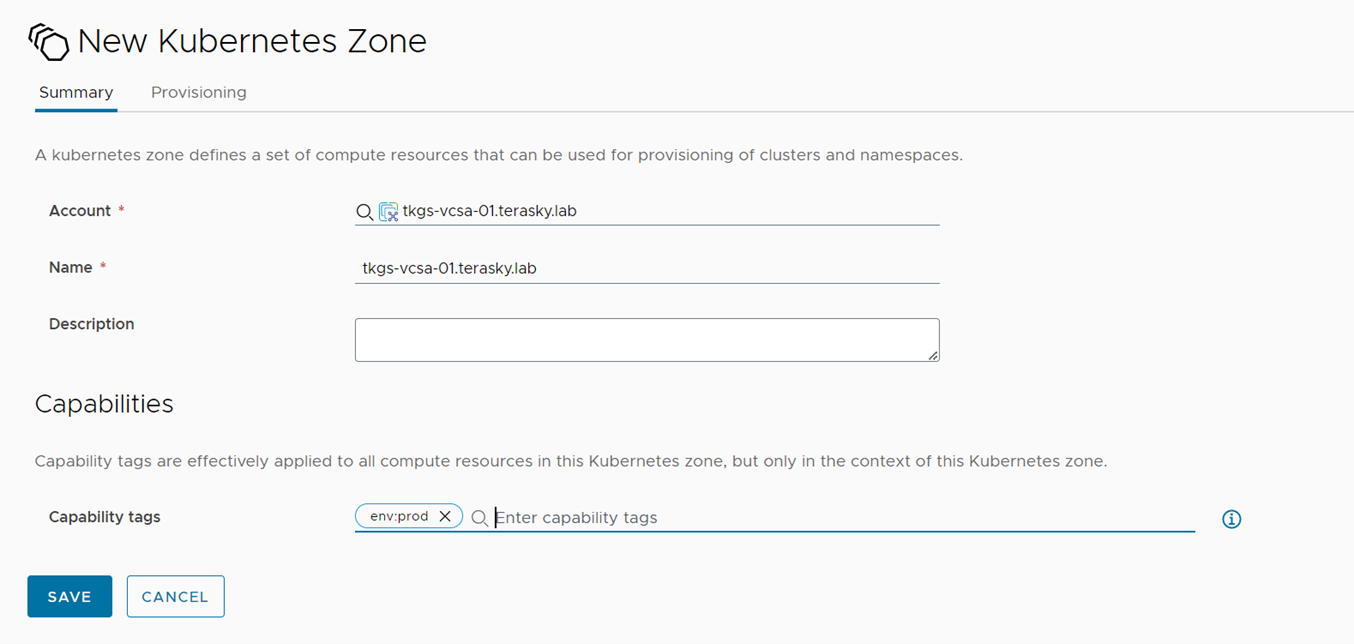
Figure 5 New Kubernetes Zone with Capability Tag
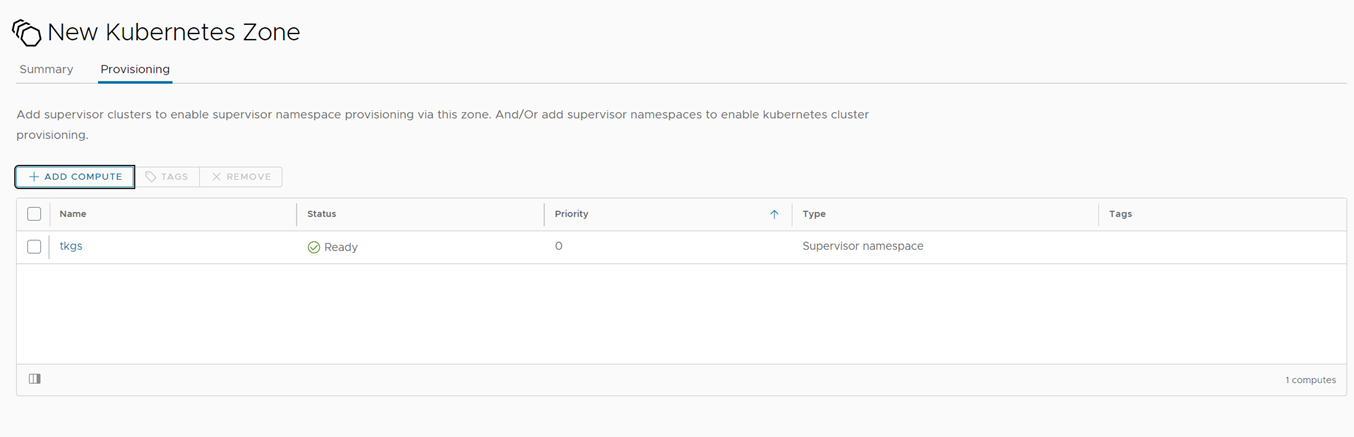
Figure 6 Kubernetes Zone – Add Provisioning Supervisor Namespace
Step 4: Create a Cluster Plan for the Deployed Machines
The next step is to create a cluster plan for the deployed machines. In this example, we will use the “best-effort-xsmall” machine class and “tkgs-gold-storage-policy” for the storage class. You can create a cluster plan by navigating to Infrastructure -> Configure -> Cluster Plans and selecting “New Cluster Plan.” Fill in the required information, including vSphere Cloud Account, name, Kubernetes version, machine class, storage class, and network settings. (Available Kubernetes versions retrieved from Supervisor Cluster)

Figure 7 Cluster Plan small
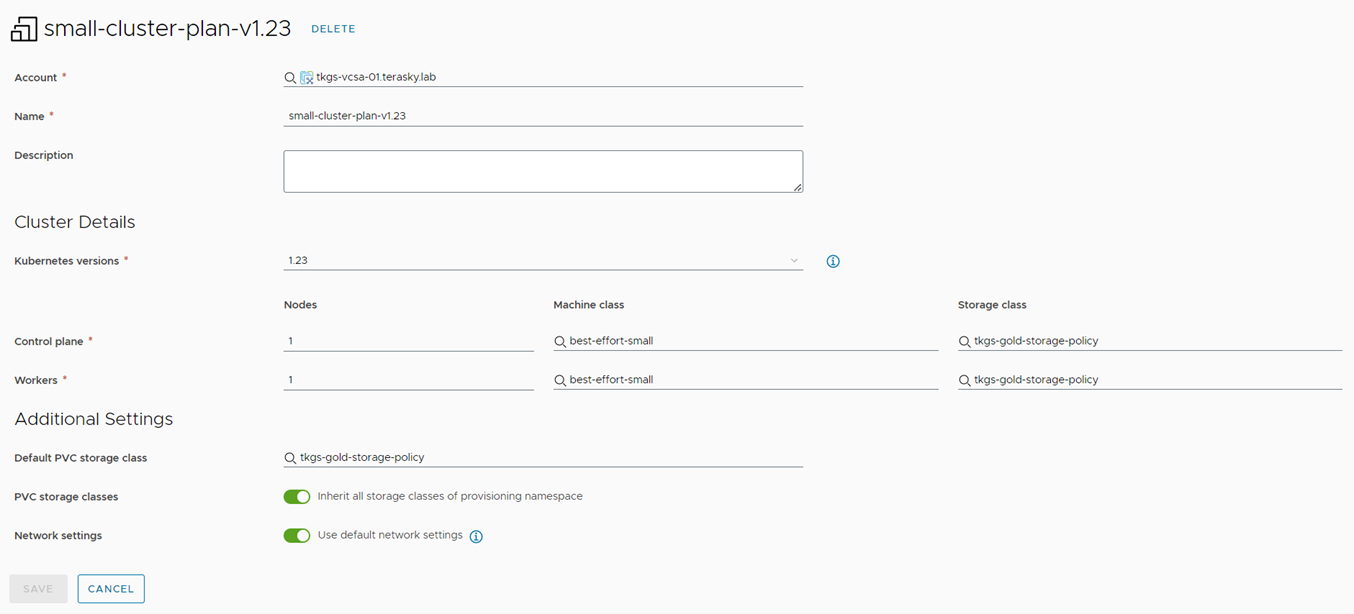
Figure 8 Cluster Plan small
Step 5: Assign Kubernetes zone to the project
To let our users provision to our new Kubernetes Zone, we will need to assign the Kubernetes Zone to our project. You can assign it from the project by navigating to Infrastructure> Administration> Project and opening your project.
Navigate to Kubernetes Provisioning and add the previously created Kubernetes Zone. Click Save.
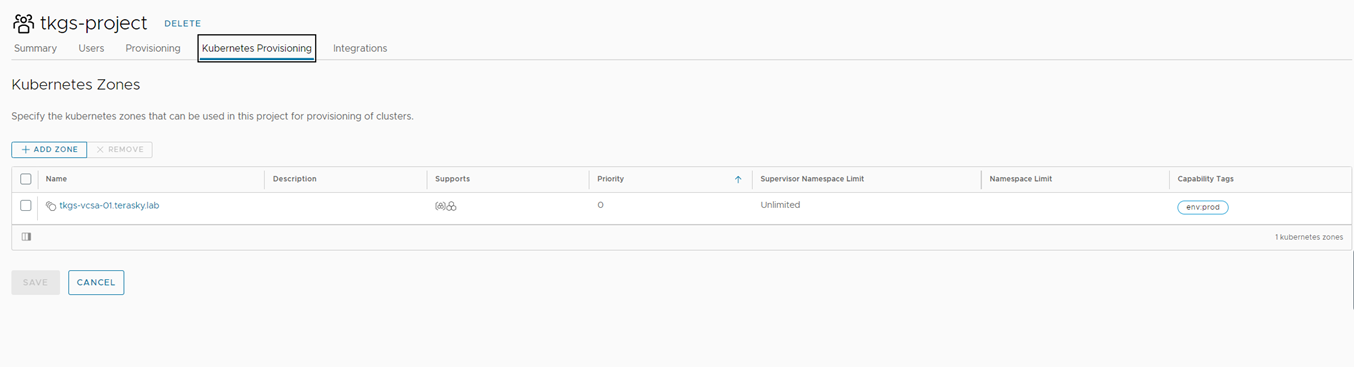
Figure 9 Assign Kubernetes Zone to Project
Step 6: Create a Blueprint to deploy a TKGs workload cluster
Now that the prerequisites are in place, you can create a blueprint defining the TKGS cluster you want to provision. You can create a blueprint by navigating to Design -> Blueprints and selecting “Add Blueprint.” Copy and paste the following YAML code into the blueprint (available for download below):
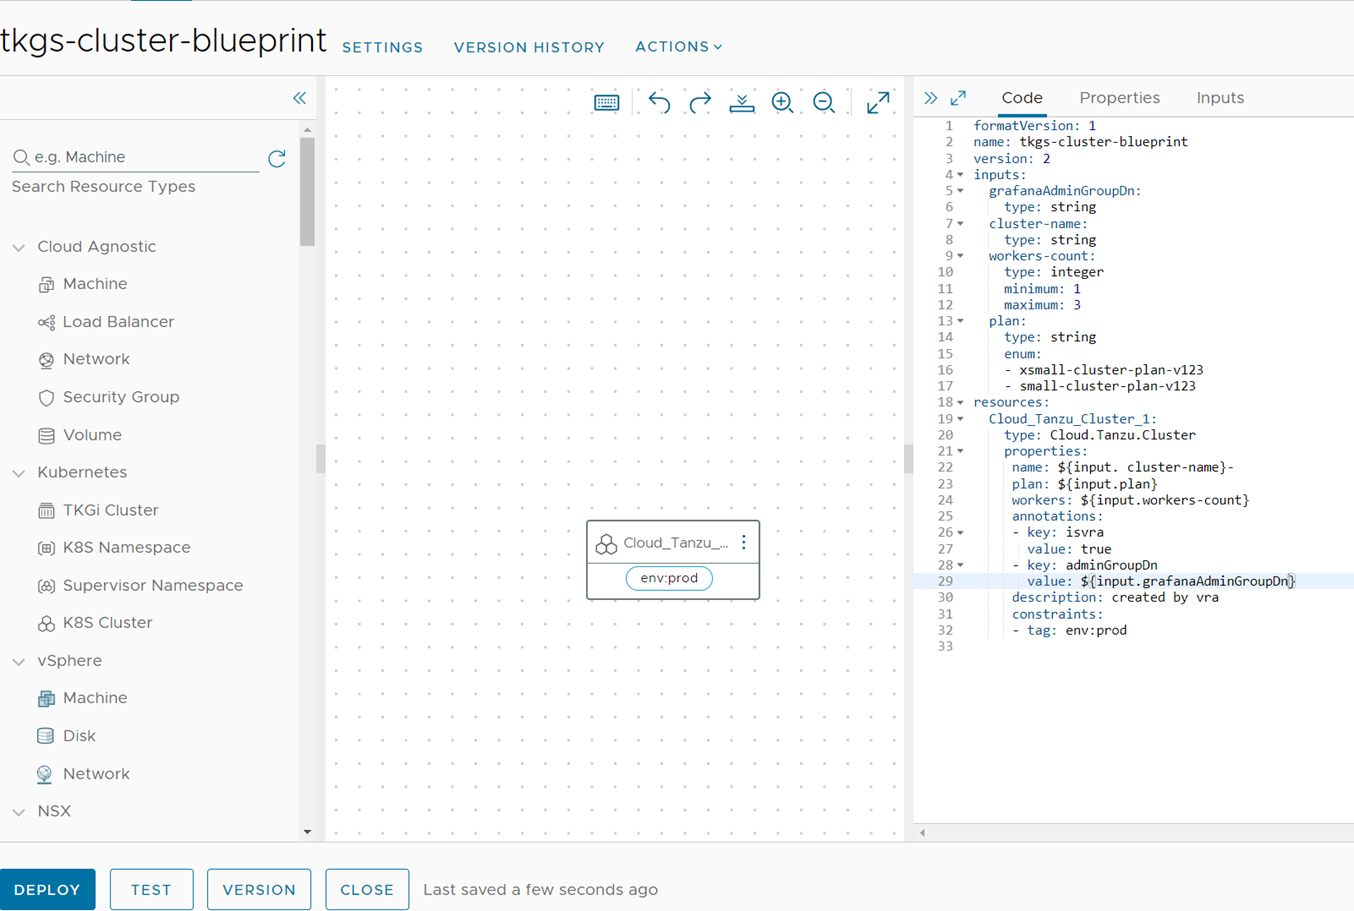
Figure 10 Blueprint yaml
After the blueprint is ready, we will publish it to the Service Broker and set up the form.
To publish the blueprint, simply create a new version and select “Release this version to the catalog.”
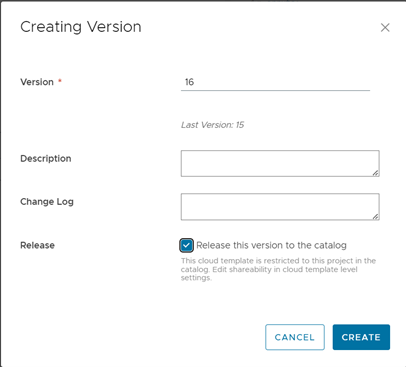
Figure 11 Release blueprint version to the catalog
Step 7: Update Blueprint in Service Broker
Next, we will update Content Sources and our content form. To do so, navigate to the Service Broker ⇒ Content & Policies ⇒ Content Sources.
Select the content source project you published the blueprint on, if it does not exist you can simply create a new content source that publishes the project’s content.
Open the Content Source and click “Validate” and “Save & Import” to update the Service Broker new content.
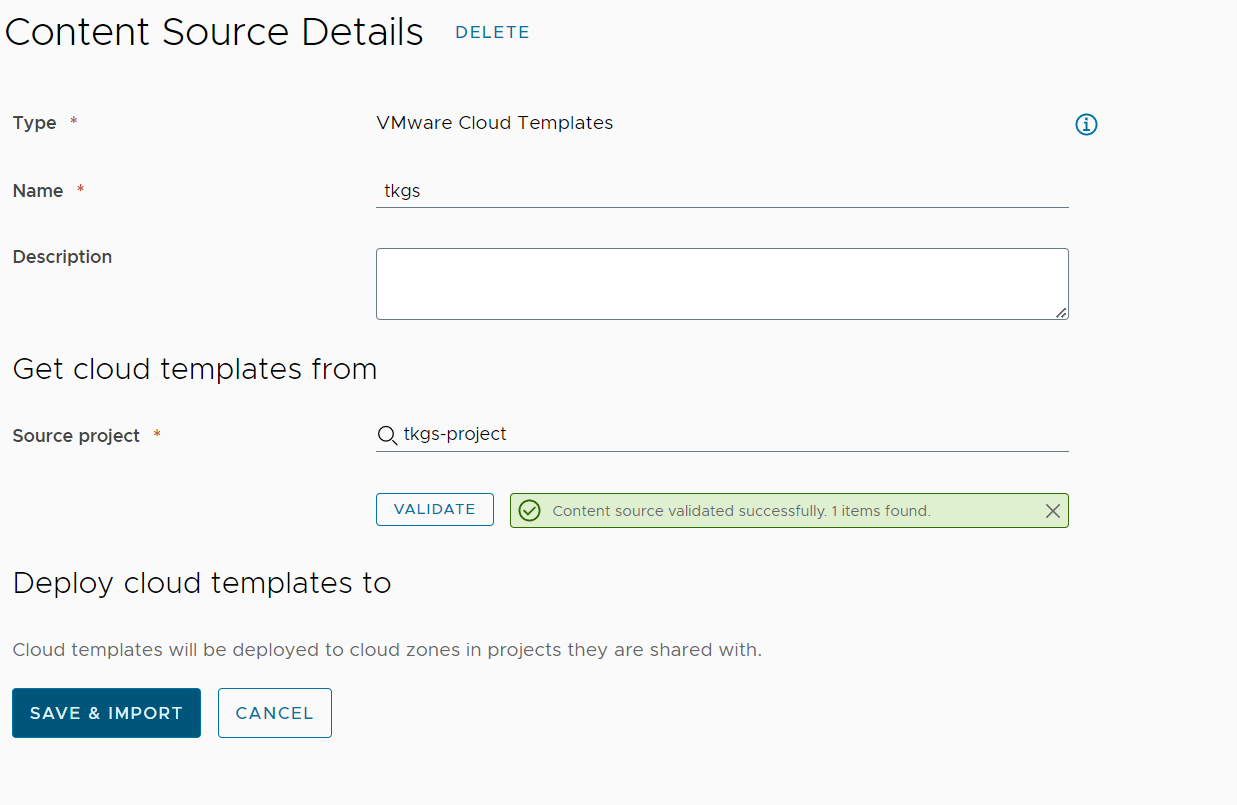
Figure 12 Update content source
To update our new content blueprint, navigate to Content & Policies ⇒ Content and locate your previously created blueprint. If it does not exist, please validate you refreshed the content source properly.
Click on the three dots on the left and select “Customize form.”
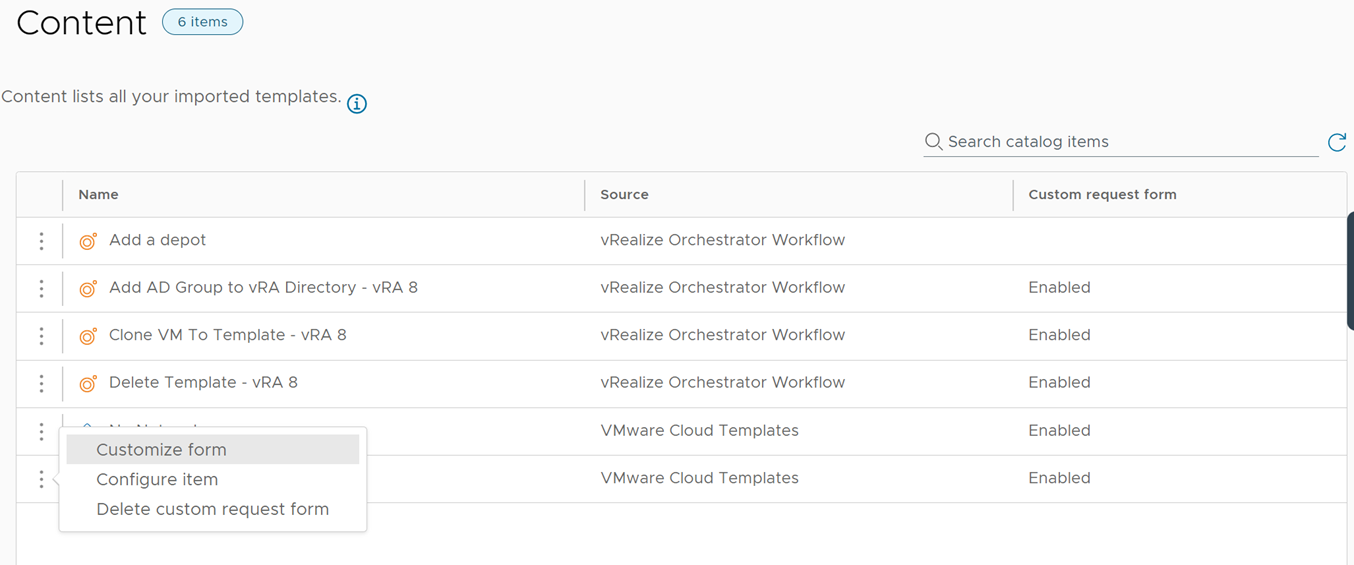
Figure 13 Open customize form
On the custom form action, you can import the form (available for download below). This will configure the form inputs and assign predefined values and vRO actions to support it.
The main reason for this is to populate the vRO action that pulls the available group’s Distinguished names as Grafana group administrators.
Once the form is imported make sure to enable it using “Enable” button on top and then click “Save”.
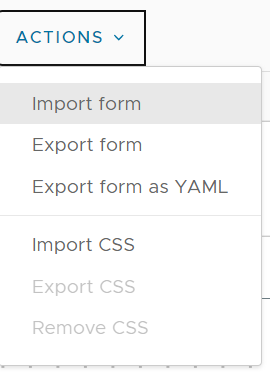
Figure 14 Import form action
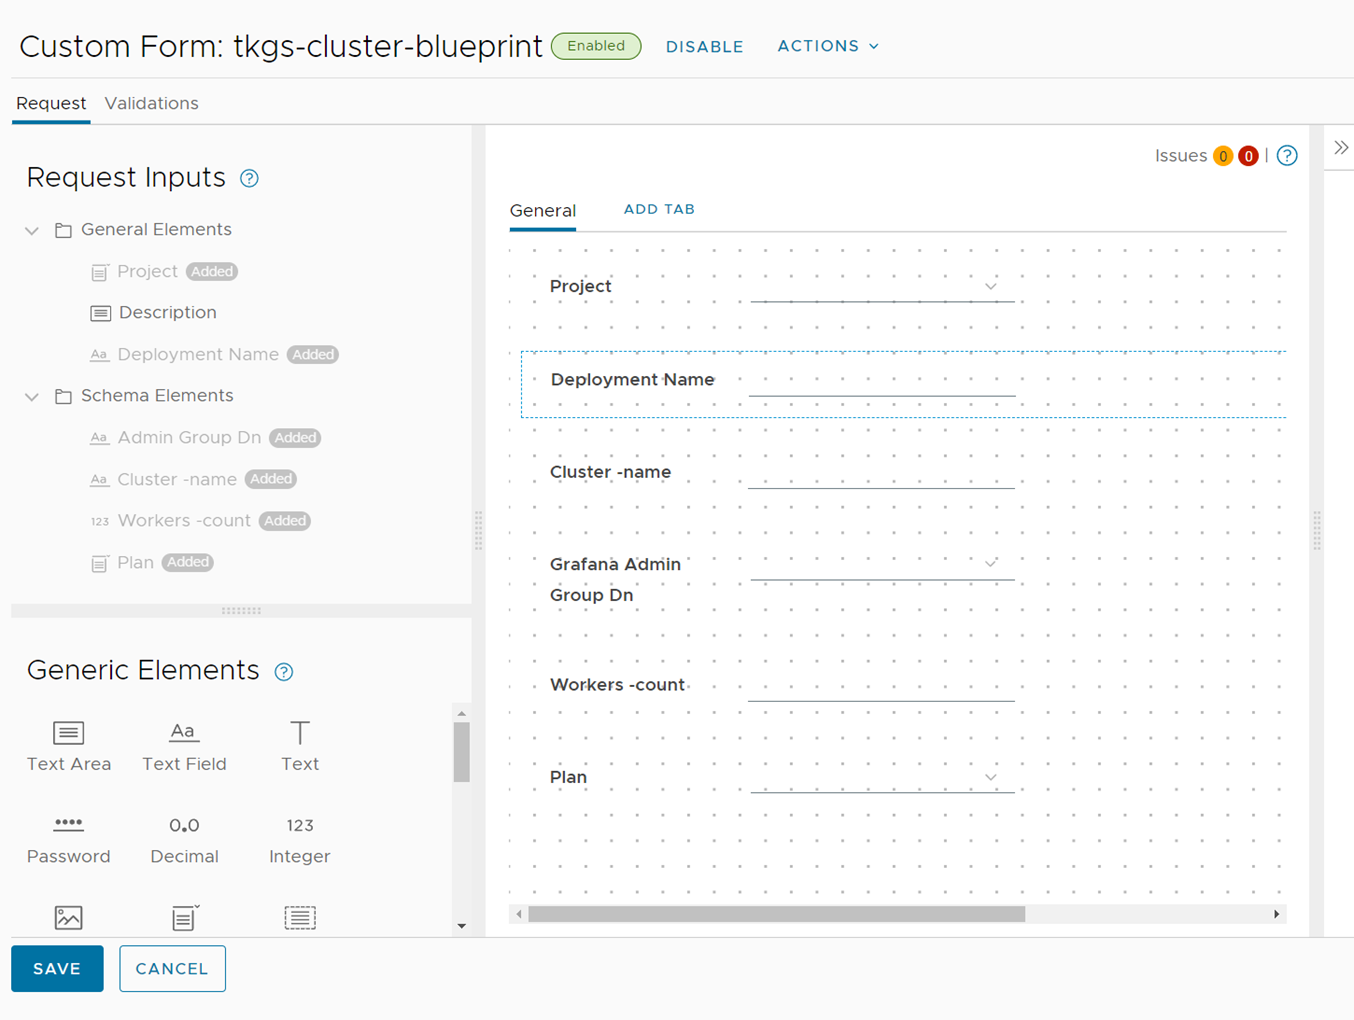
Figure 15 Imported form
Step 8: Cluster custom naming subscription and wildcard certificate
Since the vRA8 Custom naming convention can’t be applied on Kubernetes Cluster resource types, we will create a subscription to generate name uniqueness during the “Kubernetes cluster allocation” event. This will take the base name and append a unique number to it, and return the new name back to the vRA.
During this name generation, we will also create certificates (crt, key, chain) using our SSH host and return to the vRA as “annotation” on the cluster object (some limitation that we can’t pass as a custom property).
In our example, we used vRO Configuration elements with a running counter to generate a number after the given name of the cluster.
You can create an Event Subscription by navigating to Extensibility Subscriptions New Subscription, Input the subscription name, and event topic “Kubernetes cluster allocation,” and choose the ”tkgs-cluster-allocation” workflow (available for download below)
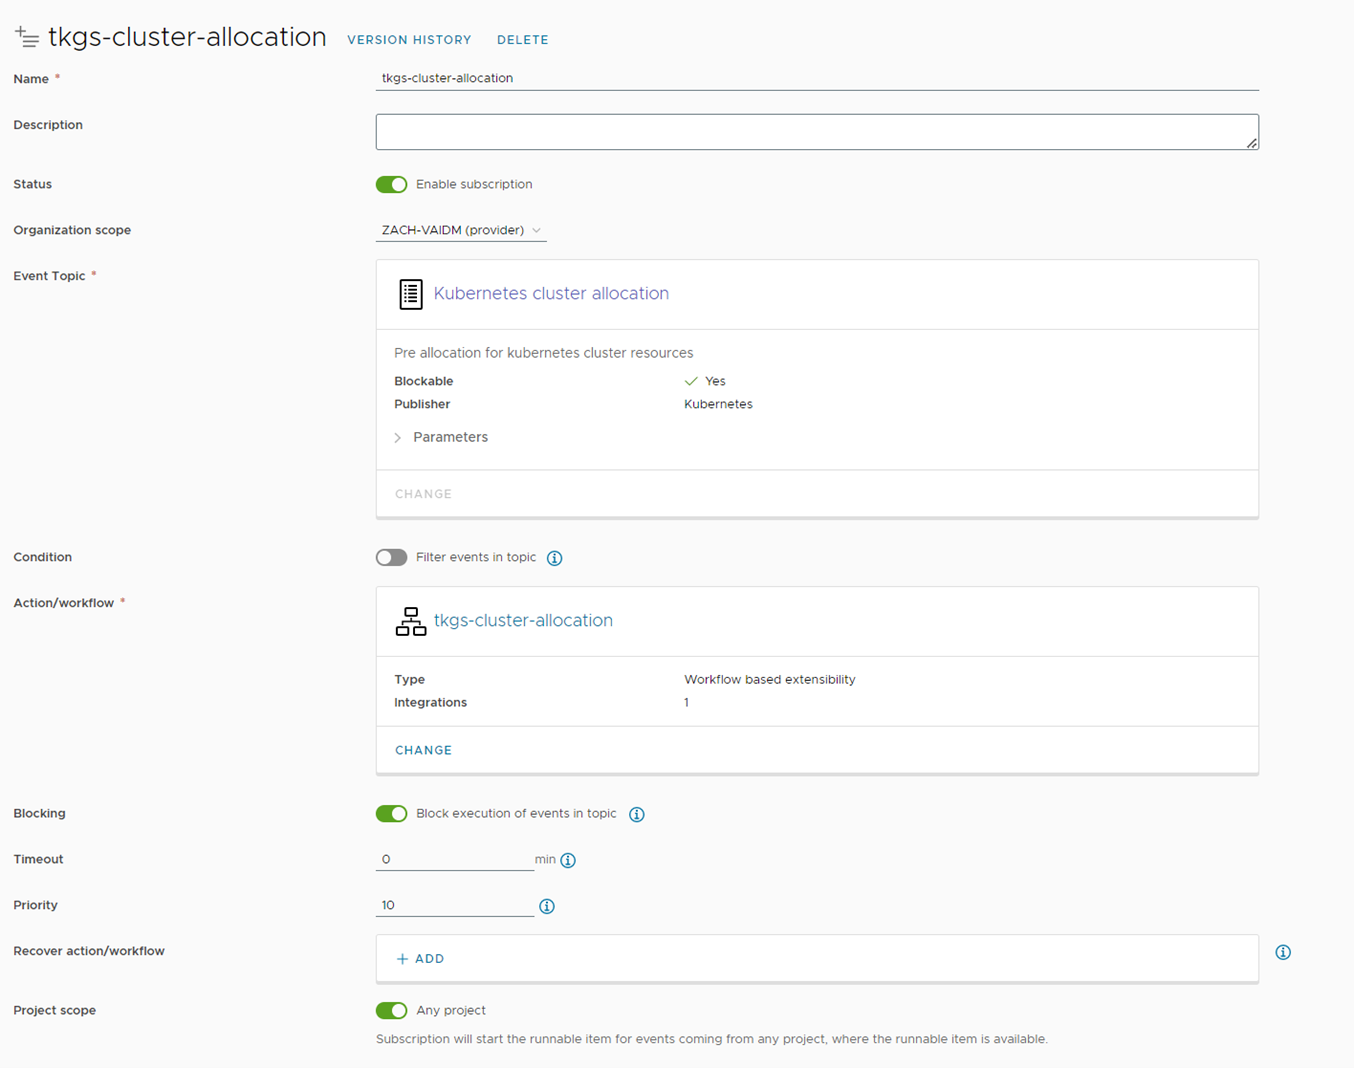
Figure 16 Creating Kubernetes Cluster Allocation Event Subscription
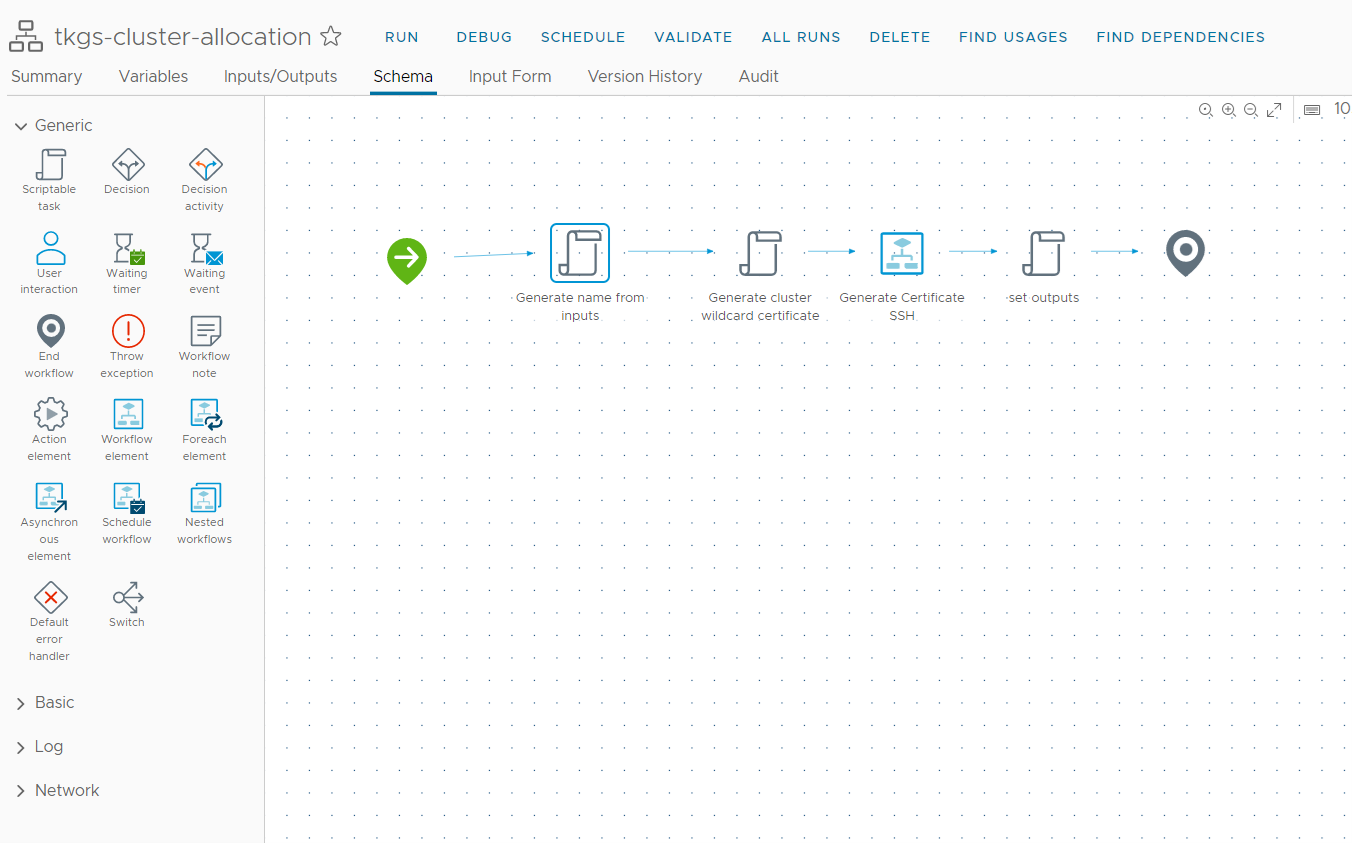
Figure 17 tkgs-cluster-allocation workflow
Step 9: Cluster post provisioning subscription
To deploy the required software on the newly provisioned TKGs cluster, we will use an Ansible playbook. The playbook will be triggered by the vRO workflow that runs after the Kubernetes cluster has been provisioned using the event subscription “Kubernetes cluster post provision” event.
You can create an Event Subscription by navigating to Extensibility ⇒ Subscriptions ⇒ New Subscription, Input the subscription name, event topic “Kubernetes cluster post provision,” and choose the ”tkgs-cluster-post-provisioning” workflow (available for download below).
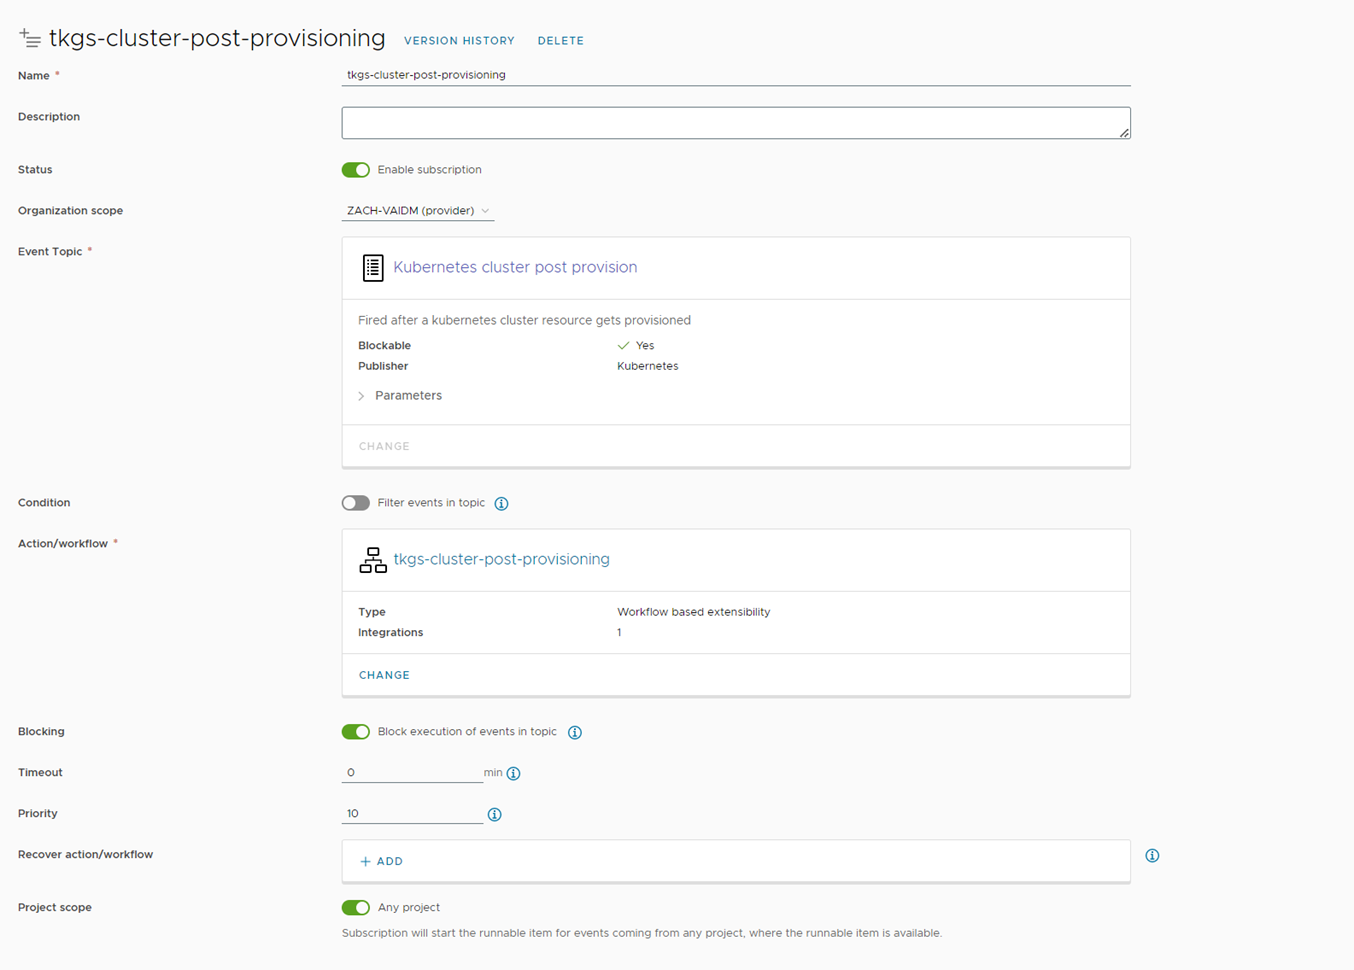
Figure 18 Creating Kubernetes Cluster Post Provisioning Event Subscription
The vRO workflow will first retrieve the kubeconfig file from the vRA and will save the file locally on the SSH host in a temporary folder to ensure the context will not change.
Before running the ansible-playbook we will export the kubeconfig file path using the command “export KUBECONFIG=/path/to/kubeconfig.yml”
We will prepare the command using the cluster values (Cluster name, Cluster namespace, Generated Certificates Grafana Admin group) and environment values from vRO configuration element that we set in advance, and pass them as Playbook variables. Then we will trigger the playbook from pre-configured SSH host on the vRO.
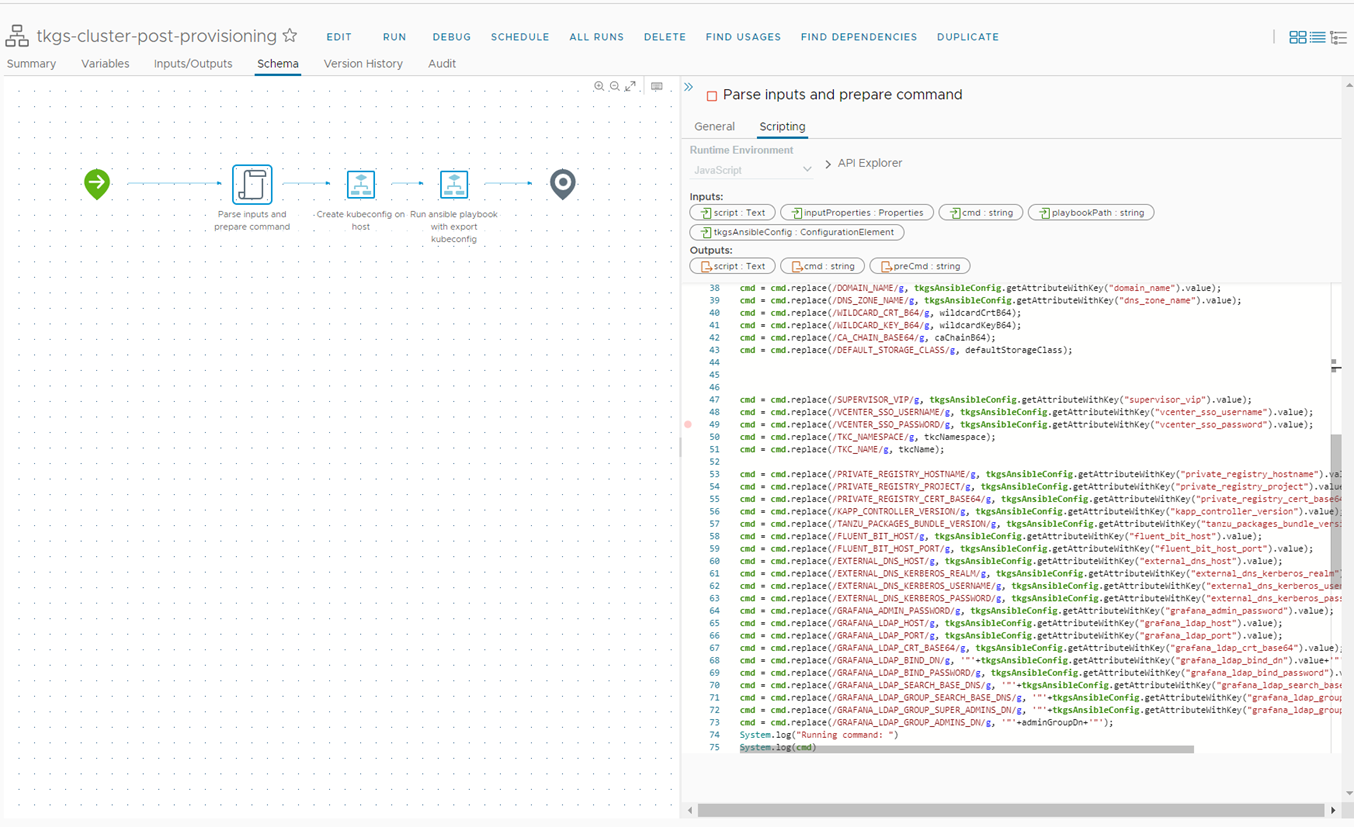
Figure 19 tkgs-cluster-post-provisioning workflow
This playbook will deploy kapp-controller, cert-manager, fluent-bit, contour, external-dns, prometheus, and grafana on the newly provisioned Kubernetes cluster.
Finally, the playbook will configure Prometheus and Grafana to monitor the Kubernetes cluster. Prometheus will scrape metrics from the Kubernetes API server, while Grafana will display these metrics in a dashboard.
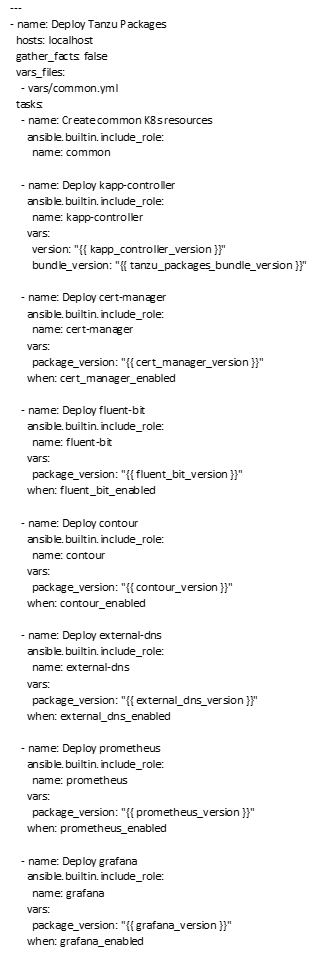
Figure 20 Playbook YAML
Step 10: Testing the flow
Once everything is in place, we are ready to provision our TKGs cluster!
From the Service broker simply request a new cluster with all the relevant inputs, wait for the cluster to get deployed and configured, and you are ready to go!
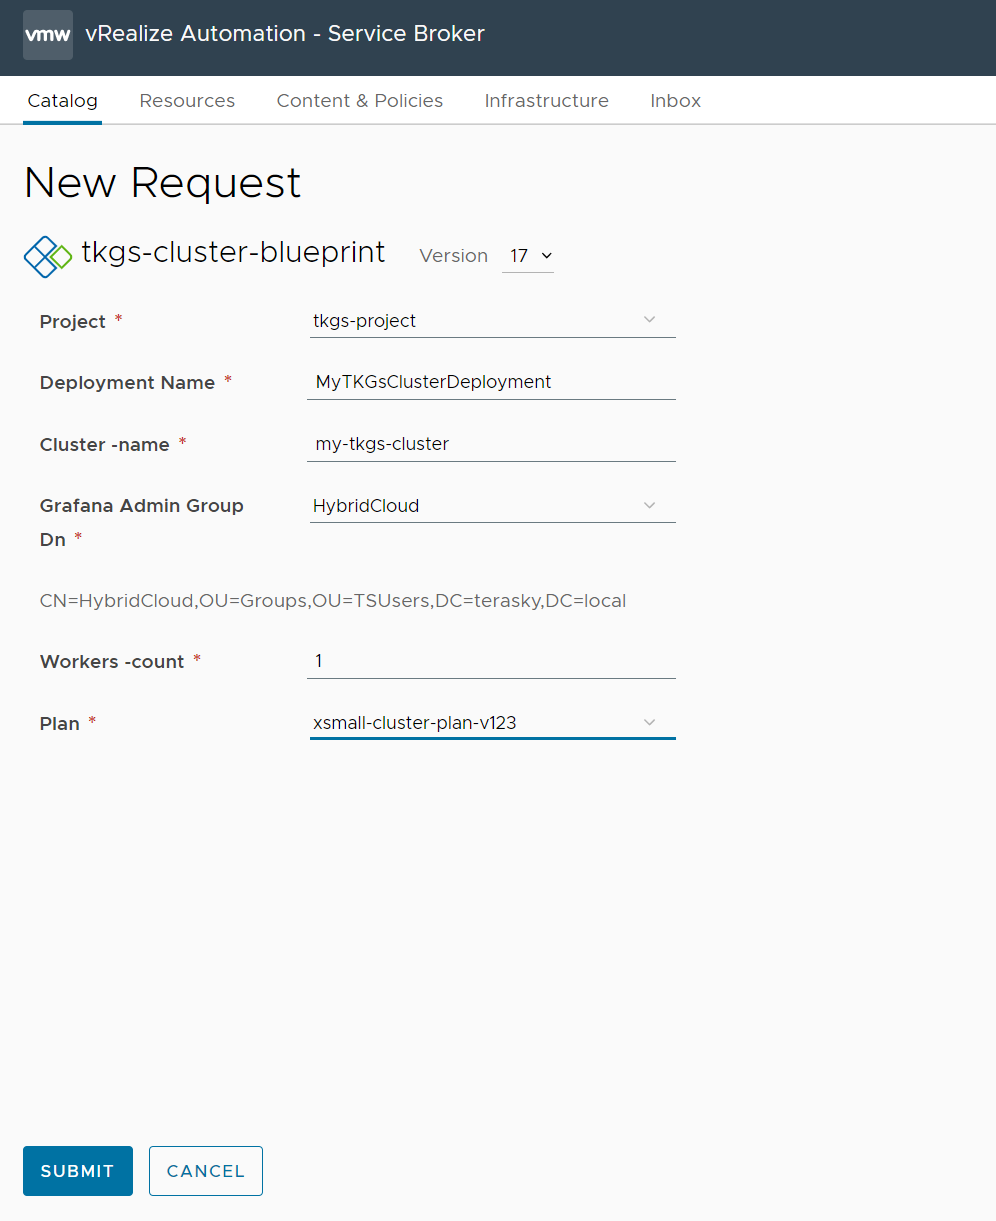
Figure 21 Request a new TKGs cluster from Service Broker
Written by: Adiel Gilboa, Cloud Automation Team Lead